
You drop into clear blue water in Cozumel, tap record, and your GoPro lens turns milky before the reef even comes into view. It’s a small disaster with a very fixable cause. Moist air gets trapped inside, then cool water does the rest. If you dry the setup, seal it in the right place, and learn what a healthy housing should feel like, your footage stays sharp and your nerves stay quiet.
Key Takeaways
- Seal the GoPro housing in air-conditioned or shaded dry air, because warm humid air trapped inside causes underwater condensation.
- Add one or two thin anti-fog inserts or silica packets, placed flat near the lens gap without touching the lens or O-ring.
- Dry the camera and housing completely before sealing by removing battery and card, then using silica gel, cool dry air, or air conditioning.
- Avoid opening the housing on humid docks; change batteries or cards indoors, in a dry bag, or only after everything cools in shade.
- If fog appears, open the housing, dry every part fully, replace spent inserts, and leak-test the empty housing before diving again.
Why Your GoPro Fogs Underwater
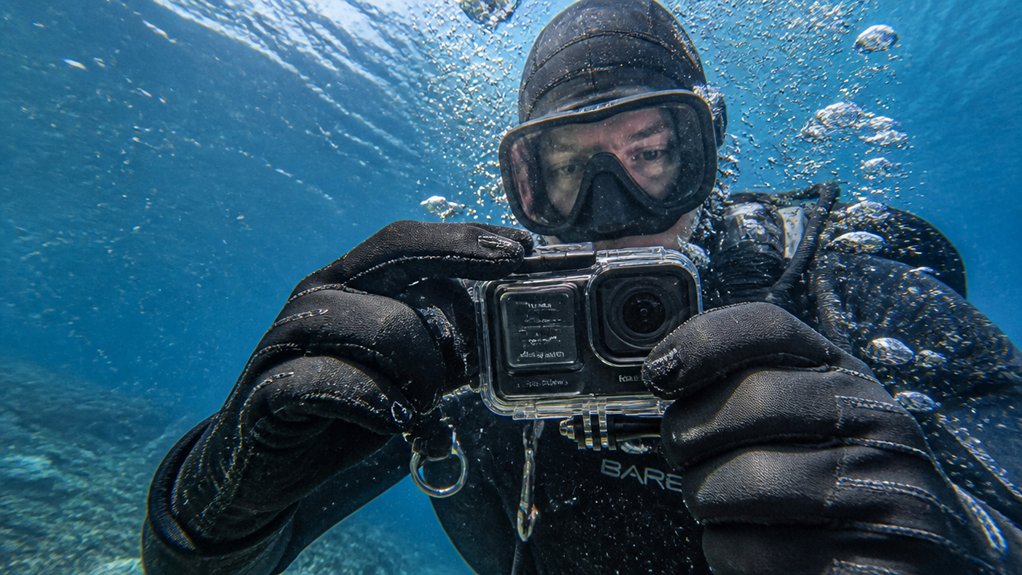
When your GoPro fogs underwater, it’s usually not the ocean plotting against your footage. Moist air gets trapped inside the camera or housing, and when colder water drops the lens below that air’s dew point, condensation forms. You usually see lens fogging in the tiny gap between the removable glass cover and the internal lens, where even a little humidity shows up fast. Warm cameras make it worse. The LCD and processor create heat, and if you seal the housing in sticky air, you trap more moisture. That’s why desiccant packs help, along with closing up in a cool, dry place and letting the camera acclimate before you dive. Tiny droplets can turn clear reef scenes into a ghostly bathroom mirror in minutes flat. Unlike color correction tools like a red filter used for sea scooter footage, fogging is caused by trapped moisture rather than underwater color loss.
Dry the Camera and Housing First
Fog usually starts with trapped humidity, so your first fix is simple: dry everything before you seal it up. Pop out the battery and memory card, and leave the battery door open so hidden moisture can escape from the camera body.
Then dry the housing too. Slip the camera and housing into a sealed plastic bag with 3 to 5 small desiccants, or even a silica gel pack, and let them sit for an hour or overnight. This prep step also helps when using sea scooter tours setups, since sealed mounts and housings can trap extra moisture before a dive. No packets around? Set everything in an air conditioned room for 30 minutes, or place it near a heater, not on it, so damp crevices dry out gently. You can also chill the powered off camera in the fridge for 30 minutes. Before reassembly, make sure every surface looks clear and feels dry.
Seal the Housing in Dry Air
Before you latch the housing shut, trap the driest air you can inside it. Close it in an air-conditioned room, a dry cabin, or at least in deep shade, where humidity isn’t hanging around like a wet towel. If you’re near scuba gear, give the case a purge with dry tank air. Even a brief puff of cool, dry air helps push out sticky ambient moisture before you seal it.
Don’t crack the case open on a humid dock to swap batteries or cards. Do that job indoors or inside a dry bag instead. If you must seal outside, let the camera and housing sit in shade or water for about 30 minutes first. Add silica gel or anti-fog inserts, then click it shut. These habits matter even more when using sea scooter tours, where longer underwater runs can make trapped moisture more likely to show up as fog.
Use Anti-Fog Inserts in the Housing
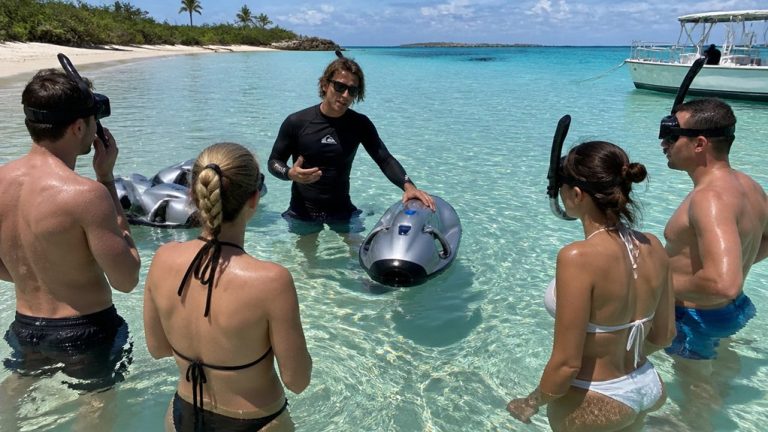
You’ll get better results when you use thin GoPro anti-fog inserts or slim low-lint packets that actually fit the housing without crowding the buttons. Tuck them near the small air gap by the lens cover, where fog usually shows up first, but don’t let them touch the lens or you’ll trade mist for streaks. Install them in dry air and give the O-ring a quick look, because even the best insert can’t fix a sneaky leak. These small prep steps matter even more when shooting clear underwater shots on a sea scooter tour, where speed and water temperature changes can make fogging show up faster.
Choosing Anti-Fog Inserts
If your GoPro tends to cloud up the moment it hits cool water, anti-fog inserts are one of the simplest fixes you can pack.
Choose thin, reusable felt pads made for GoPro housings if you want a reliable, tidy option. They soak up the moisture that would otherwise condense on the lens, and a single set usually lasts through several trips. Official anti fog inserts are easy to reactivate with low heat or an oven, following the maker’s instructions. If you like alternatives, use correctly sized silica gel or indicating desiccant packs instead. They are especially useful to include with your sea scooter tour gear so your camera stays clear during the ride. Check them before each dive. If they look discolored, feel damp, or seem oddly heavy inside the camera, dry or replace them. Your footage stays clearer, and your housing does too.
Proper Insert Placement
Because placement matters as much as the insert itself, slide your anti-fog pads into the housing’s front cavity between the lens cover and the camera, and keep them flat so they don’t brush the lens or any electronics. Use one or two small inserts in a standard housing, or the thinner LCD-backdoor version so buttons and ports stay clear. Keep each pad away from the door seal and O-rings, where a stray edge can shift and ruin your day. Before every dive, check that the inserts are dry and ready to pull moisture in the air from the air in the camera. Recharge silica gel as directed, usually with gentle oven heat, and stash spare inserts in a sealed bag with fresh desiccant nearby. On sea scooter tours, store your phone in a waterproof case separately so extra moisture stays away from your camera setup.
Prevent Fogging From Temperature Swings
When a cool dive meets a warm camera, fog can bloom across the lens in seconds and turn clear blue water into a soft gray smear. Let your camera and housing acclimate for 20 to 30 minutes before you seal up. Close it in an air conditioned room, or purge with dry tank air, so trapped air starts drier. Use fresh desiccant inserts, then switch off Wi Fi, voice control, GPS, and the LCD to cut heat. This matters even more when filming a sea scooter tour, where fast movement through changing water layers can trigger sudden fogging.
| Move | Why |
|---|---|
| Wait first | Less shock |
| Seal it cool | Lower humidity |
| Kill extras | Less heat |
For cold water, pre cool the camera in shade or the shallows before filming. Your lens stays clearer, and your reef looks crisp. That pause beats watching turtles through bathroom glass on dives.
How to Clear Fogging and Spot Leaks
If your GoPro fogs up, open the housing, pull out the camera and covers, and let every part dry fully in a low-humidity room or a sealed bag with silica gel until the last trace of moisture is gone. Then check the O-rings, seams, and port glass for salt trails or wet marks, and test the empty housing in water to catch bubbles before they ruin your next swim. If one spot stays damp like a tiny clue that won’t quit, you’ve likely found a bad seal, and you should fix it and run one more quick leak test before heading out. Just like check-in timing matters before a sea scooter tour, giving yourself enough time to inspect and dry your GoPro properly can prevent problems once you’re in the water.
Clear Existing Fog
Start by taking the housing apart in a dry, warm room and letting every piece air-dry completely. Remove the camera and any lens cover, then wipe every surface with a lint-free cloth. Look closely inside the housing and around the lens gap for tiny beads that condense on the lens after humid air gets trapped inside. If anything still feels cool or damp, seal the parts in a bag with fresh silica gel for a few hours or overnight. Stubborn fog means your desiccant may be spent, so swap in fresh packs or reactivate reusable ones as directed. Reassemble only when everything is bone dry. Then tuck in a fresh anti-fog insert before closing the housing. On guided water outings like sea scooter tours, wetsuits and gear are often provided, so dry any included equipment fully before sealing your camera setup nearby. Your next dive should look crisp again underwater.
Check For Leaks
Before you blame every cloudy shot on trapped humidity, take a minute to rule out a leak. First, inspect the O-rings and seals for nicks, hair, or grit. Replace damaged ones and add a light smear of lubricant. Then dry the housing, close it without the camera, and submerge it shallowly for 30–60 seconds. Watch for bubbles or water entry. If the haze sits only on the inside of the lens and your leak test stays clean, remove the camera and inserts and dry everything with silica gel or cool, dry air. Check hinge pins and battery doors for microleaks with a gentle squeeze test. After any leak, dry, reseal, and retest before diving again. Persistent fog usually means moist air, not flooding. If moisture damage affects your booking plans, review the refund policy before canceling a sea scooter tour.
Frequently Asked Questions
Can a Scratched Housing Lens Make Underwater Footage Look Foggy?
Yes, you can get foggy underwater footage from a scratched housing lens because scratched clarity issues and lens diffusion scatter light, lower contrast, and exaggerate backscatter. You’ll often notice highlights bloom, especially with GoPro shots.
Do Aftermarket Dive Housings Fog More Than Official Gopro Housings?
Yes, you’ll often see aftermarket dive housings fog more than official GoPro housings because third party materials, poorer seals, and limited venting options trap moisture. You’ll get results when you inspect O-rings and add desiccants.
How Often Should I Replace My Gopro Housing Seal?
You should replace your GoPro housing seal yearly with regular use, or every 3–6 months if you dive often. Check it before outings; damage, leaks, or poor lubrication shorten seal lifespan and accelerate replacement schedule.
Is Fogging Covered Under Gopro’s Warranty or Return Policy?
No, you usually won’t get warranty coverage or return eligibility for normal condensation fogging. You should document troubleshooting first. If a faulty seal or cracked housing caused it, you can file a claim for replacement.
Can Underwater Filters or Red Lenses Increase Apparent Fogging?
Yes, like a stage light revealing dust, underwater filters or red lenses can make fogging seem worse. They don’t create condensation, but you’ll notice more color cast, contrast loss, and droplets or residue on housing.
Conclusion
Keep your GoPro dry, seal it in cool low-humidity air, and slip in fresh anti-fog inserts before you head for the water. Check the O-ring, do a quick shallow dunk test, and let the camera cool before you close the housing. If fog shows up, don’t jump the gun and assume a flood. Open it, dry every surface, swap the packs, and test again. Then you’ll catch clear reefs, silver bubbles, and that hush below.