You’ll get cleaner underwater shots on a sea scooter tour when your setup feels almost boring on the surface and quietly precise below it. Keep the camera tucked near your waist, use gentle power, and watch how sand, bubbles, and a loose strap can ruin a perfect frame in seconds. A reef can glow blue and gold one moment, then turn foggy with one bad move. The small fixes matter more than you’d think.
Key Takeaways
- Use a short, rigid quick-release mount at waist level, keeping the camera close and angled about 15° downward for steadier footage.
- Trim your body slightly head-up, tuck elbows, bend knees, and keep the scooter close to reduce drag, wobble, and framing shifts.
- Shoot at quarter to half power, using 1–3 second bursts, then hover briefly so the camera settles before taking photos.
- Match scooter speed smoothly to your subject, and avoid long full-power pulls that cause motion blur, prop wash, and backscatter.
- Check batteries, locks, O-rings, and straps before entering, and keep at least a 30% power reserve to avoid mid-shot cutoffs.
Choose a Stable Sea Scooter Camera Setup
Start with a setup that stays calm in the water. Build a stable sea scooter camera setup with a fixed quick-release mount or a short, rigid arm set close to the scooter. That keeps the camera steady and lets you detach it fast if something snags. Set the rig around waist level and angle the lens about 15 degrees down. That matches scooter trim, cuts drag, and helps you position your subject without chasing the frame. For cleaner footage, use GoPro settings that match underwater light and motion during sea scooter tours. Fold long arms tight, and tape or tuck straps and cords so nothing brushes reef or kicks up silt. Check buoyancy control before you roll in, and pick a housing with a visible battery gauge. If you don’t have one, confirm a 30 percent reserve before the dive.
Balance Your Gear Before the Dive
Before you hit the water, balance your rig so it rides level instead of tugging your chest down like an overpacked carry-on. Tighten your tank straps, shift trim weight higher, and keep camera arms folded in close so the scooter and housing stay snug against your body. Since many operators include wetsuits and gear on sea scooter tours, confirm the fit and placement before launch so your trim stays predictable. Then check every strap, pocket, and handle position to make sure your loads stay put and your trim feels slightly head-up, smooth, and ready for clean shots.
Trim And Weight Placement
Balancing your gear on land makes the whole sea scooter photo run feel smoother once you slip into the water. To offset front-heavy camera rigs, move trim weights higher on the tank to raise your center of buoyancy and help your body level out. If you’re new to an underwater sea scooter, expect a short adjustment period as you get used to steering and buoyancy control in Oahu waters.
- Mount the camera and arms exactly where you’ll use them.
- Do a shallow hover test and tweak small lead pieces or battery cases.
- Add 1 to 3 pounds to your lower back until your legs float slightly up.
- Recheck trim after spare batteries or strobes shift weight forward, and keep 30% battery in reserve while you fine tune.
When balance clicks, the scooter tracks cleaner and your shots stop looking like they were aimed by a curious seal on day one.
Secure Straps And Loads
Lock everything down on land so the water feels calm instead of chaotic. Before you enter, tighten tank bands, then slide trim weights higher on the cylinder to lift your center of gravity and offset a heavy camera rig. Add small weights to the back of your harness or pockets behind the tank to neutralize the forward pull from your scooter and housing. Keep the scooter and camera tucked close. Fold long arms, secure straps, and stash loose cords in sealed pouches so nothing swings like a tiny sea monster. Don’t forget essential gear like a mask defogger or dry bag so your setup stays organized before the dive. Aim for flat horizontal trim with your legs slightly raised. Bench-test the setup in shallow water. At quarter to half power, you should hover with minimal finning and still feel steady in both hands.
Mount Your Camera for Steady Shots
Start with a solid mount, and your footage will look calmer the moment the scooter starts to hum. A fixed mount or quick‑release arm keeps the camera at waist level for steady shots and fast detachment. Keep it close to your body, and fold long arms near coral so leverage doesn’t turn little bumps into wobbles. Try one of these GoPro mount ideas to match your sea scooter setup and shooting angle.
- Pick a mount that fits the handle and leaves trigger grip clearance.
- Hold the scooter with your right hand and the camera with your left for balanced control.
- Stash spare plates and hardware in a mesh bag or sealed case.
- Test release locks, O‑rings, cable ties, and tethers in shallow water so nothing snags, twists, or blurs the view on your first run over rippled sand and rock.
Set Sea Scooter Speed for Sharp Photos
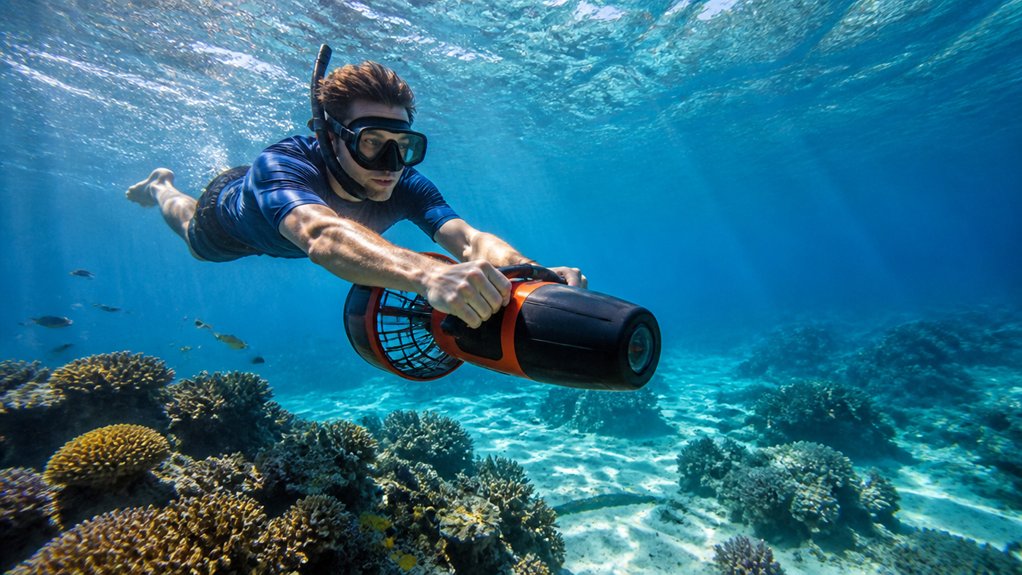
Once your camera sits steady on the scooter, speed becomes the next thing that shapes a sharp photo. Use quarter to half power, about 0.5 to 1.5 mph, to minimize motion blur and keep control. You should hold the scooter at waist level, tip it 15 degrees down, and tuck your elbows. Before you descend, add anti-fog inserts or let the housing acclimate to reduce underwater fogging on the lens.
| Setting | Best use | Why |
|---|---|---|
| Quarter power | Still scenes | Less blur |
| Half power | Easy tracking | Better control |
| Full burst | Reposition only | Less backscatter |
For tracking shots, match scooter speed to your subject and keep distance with gentle thumb pressure, not jerky trigger taps. Use brief full-power bursts only to reposition. Then cut throttle and shoot while hovering with the motor off or low, so prop wash doesn’t stir a snowy cloud. Check the battery gauge often and save 30 percent. Slower runs spare power and prevent rushed, blurry fast sprints.
Stay Streamlined While You Shoot
You’ll get steadier shots when you hold the scooter at waist level, angle the nose slightly down, and keep your legs a little raised so your body slices through the water cleanly. Keep the scooter and camera close, tuck in your elbows, and secure any loose straps or long arms so nothing flaps around like an underwater windsock. That compact setup cuts drag, calms wobble, and lets you move past coral and tight spaces with more control and less fuss. Following a video shot guide before your ride can also help you plan smoother, more intentional underwater footage.
Compact Body Position
While the scooter pulls you along, keep both it and your camera close to your body so your whole setup moves like one clean shape through the water.
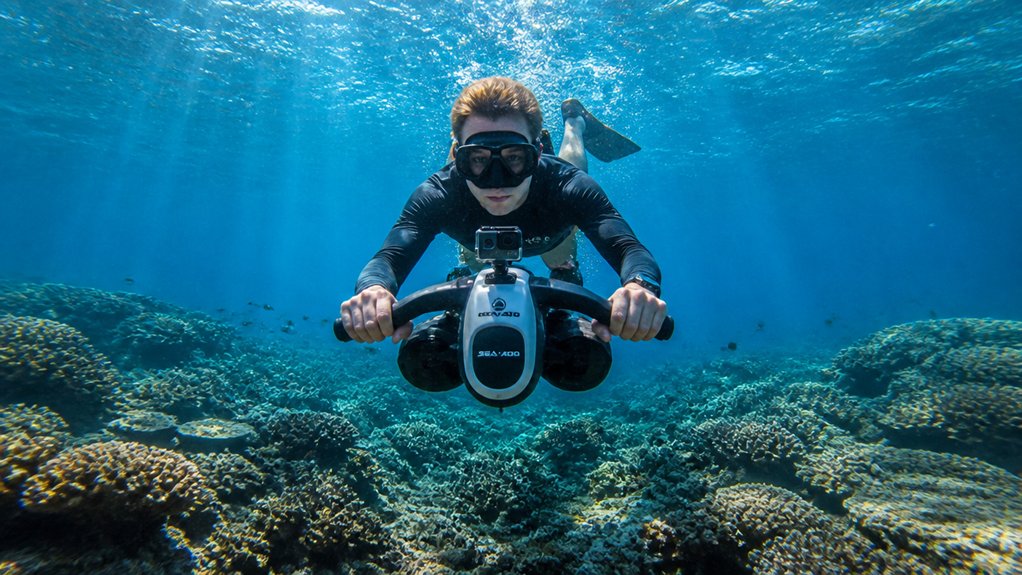
- Hold the scooter at waist level, angled about 15° downward, and keep scooter close to cut drag.
- Tuck your elbows in and fold long camera arms near your chest, so the frame stays steady instead of wobbling.
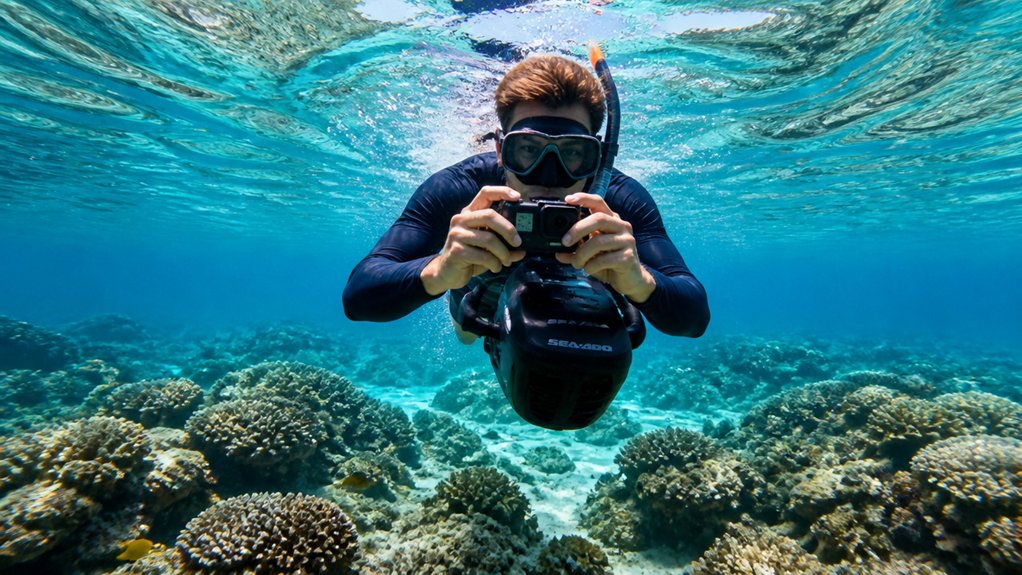
- Practice two-hand operation: right hand feathering the trigger, left hand guiding the camera, both centered to reduce torque.
- Slightly raise your legs, bend your knees, use soft fin kicks, and tighten tank straps or shift trim weight higher for level trim.
You’ll feel less shake, hear quieter water, and notice fish stay calmer as your profile glides past nearby. This kind of stable trim is especially useful during the sea scooter tour step-by-step flow, when smooth movement helps you stay composed and ready for clearer shots.
Tucked Gear Placement
Because water rewards tidy shapes, tuck every piece of gear close to your torso before you start shooting. Keep the scooter and camera near your ribs, elbows bent, for steadier framing and smarter tucked gear placement. If you have mobility concerns, ask about tour accessibility before launch so you can position your shooting setup without adding strain.
| Move | What you feel | Why it matters |
|---|---|---|
| Fold camera arms | Water goes quiet | You steer clear of snagging |
| Stow spares aft | Balance feels easy | You keep neutral trim |
| Aim scooter 15° down | Reef drifts by cleanly | Torque stays tame |
Secure loose straps in a sealed mesh bag, tighten tank straps, and shift weight higher or add a little rear ballast. Your rig feels less twitchy, coral stays safely out of the way, and you glide like you meant it, even when a curious fish photobombs your frame suddenly.
Use Natural Light for Better Color
Often, the easiest way to get richer underwater color is to let the sun do the heavy lifting. On a sea scooter, Natural light rewards you fast when you stay shallow, move smoothly, and focus on getting close. In bright, shallow water, a red filter is often unnecessary because natural light can preserve stronger color on its own.
- Stay within the top 10 to 15 feet on sunny runs. That’s where reds and yellows hang on longer.
- Put the sun behind you or slightly off to one side, about 10 to 30 degrees. You’ll get glow and light shafts without frying bright highlights.
- Keep your camera within 3 to 6 feet of the subject. Getting close cuts the water between you and the scene, so color and contrast stay cleaner.
- Use gentle scooter bursts and a streamlined body position. Less silt means clearer water, better texture, and fewer murky surprises.
Add Strobes Without Causing Backscatter
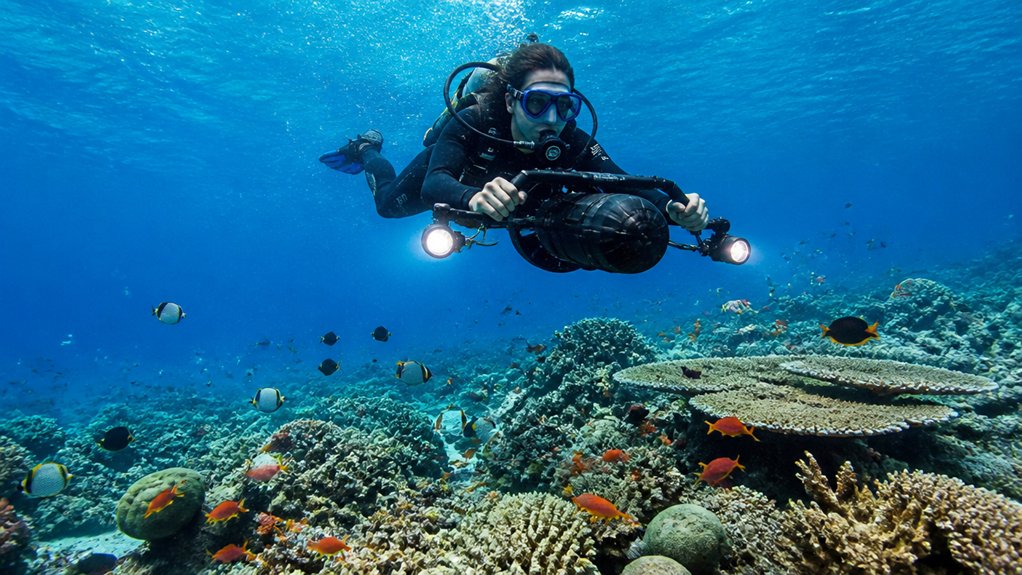
Natural light gets you far, but a pair of strobes can bring back punch and texture when the water starts to look flat. To keep backscatter under control, place your strobes slightly ahead of the camera and angle them 30 to 45 degrees outward from the lens. That throws light across your subject instead of straight into drifting particles.
Get close, ideally within a few feet, so less water sits between you and the shot. In Waikiki water clarity, staying close to your subject is especially helpful because clearer conditions can still reveal suspended particles once strobes are added. Use diffusers or softer power to spread light and tame sparkly flecks. When you shoot macro, dial strobe power down even more. Approach from the side and keep your scooter wash trailing behind you, not rolling into the frame. Your photos will look cleaner, richer, and far less snowy underwater.
Use Short Scooter Bursts to Reposition
For cleaner moves between shots, use your sea scooter in short bursts instead of a long pull. You’ll close distance with less wash, less backscatter, and steadier framing when the water turns glittery around your lens.
Use short sea-scooter bursts between shots for cleaner approaches, steadier framing, and less wash when the water turns glittery.
- Use short scooter bursts for 1 to 3 seconds at quarter to half power, then release to reposition without blur.
- After each push, hover with breaths and tiny fin kicks so your camera settles for focus before you press the shutter.
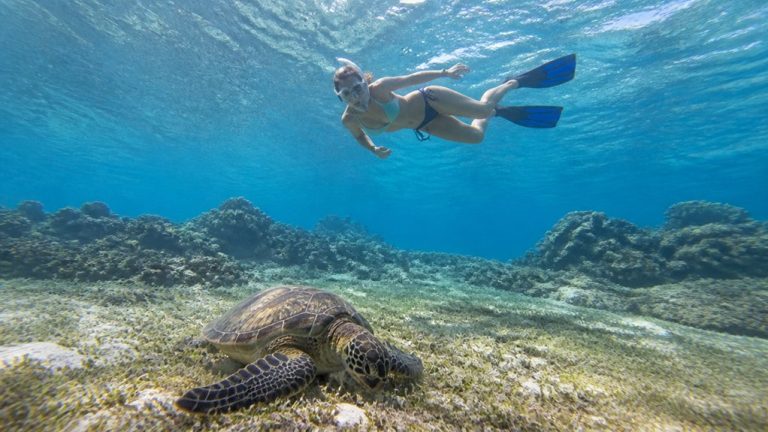
- Match speed to the subject. Use longer bursts for turtles, brief taps for darting fish, and keep distance steady nicely.
- Keep the scooter near your waist, angled slightly down, and watch battery levels so you save power and finish with a 30% reserve for the ride home.
On tours where you can breathe normally, relaxed breathing between bursts also helps you settle the camera and avoid rushed, shaky shots.
Approach Marine Life Without Scaring It
Ease into the encounter from the side, not straight at the animal, and keep your motor at low power so you don’t blast sand or send fish bolting. As you approach marine life, stay about 6 feet away so you maintain distance and avoid startling fish while keeping the water clear.
Use smooth quarter to half power bursts and match the animal’s pace. Point the scooter slightly downward, about 15 degrees, tuck your elbows, and keep the camera close to your body. That cuts prop wash and makes your gear look quieter. In Hawaii, follow sea turtle etiquette and give turtles extra space when viewing or photographing them. Don’t stop abruptly or rush head on. Instead, drift or circle slowly so the animal reads you as harmless. Keep flash low. For shy creatures, pause at 15 feet and wait calmly.
Track Moving Subjects at a Steady Pace
To track a moving subject well, you’ll want to match your scooter speed to its pace and keep your framing calm instead of chasing every twitch. Hold a steady distance as you move, whether you’re following a bright fish through open blue water or easing in close for tiny reef details. Keep your line smooth and straight, and your shots will look cleaner, sharper, and a lot less like the ocean gave your camera a playful shove. On a Sea Scooter Tour for Seniors in Waikiki, a comfort-first pace can also make it easier to stay steady enough for clearer underwater shots.
Match Subject Speed
Often, the smoothest tracking shots happen when you match your scooter to the animal instead of chasing it. To match subject speed, ease the throttle to quarter or half power and glide at a calm 0.5 to 1.5 mph.
- Hold the scooter at waist level, angled 15° down. Use two hands to keep your line straight.
- Anticipate the animal’s path. Start moving slightly ahead, then use brief throttle taps to speed up and gentle release to slow.
- Turn on continuous autofocus and a high frame rate. Tuck your elbows in so turtles and reef fish stay crisp through blue water.
- Watch battery levels. Keep at least 30% in reserve so you can maintain a constant distance without a sudden dead-scooter surprise late.
If you’re new to this, a first-timer walkthrough can help you practice steady pacing and smoother subject tracking before the tour.
Hold Constant Distance
Holding a steady gap is what makes a moving turtle or reef fish look calm and sharp instead of jumpy and soft. Match your scooter’s pace, usually two to three mph, then keep the throttle constant so your focus stays locked underwater. On Oahu, sea turtles often glide at an even pace, making them ideal subjects for practicing smooth parallel tracking.
| Do | Why |
|---|---|
| Hold the scooter low, angled down | It helps you hover and keeps framing stable |
| Use short power bursts | You reset position without drifting closer |
| Tuck elbows, camera close | Small arm moves won’t change distance |
| Stay six to ten feet wide, one to three macro | You minimize the amount of water between lens and subject |
Train autofocus on a high-contrast spot, then watch the subject, not your speedometer. If the fish twitches sideways, tap power once and settle into parallel tracking.
Glide In Straight Lines
Usually, the smoothest tracking shots happen when you glide like you’re on rails. Set quarter to half power, about 2 to 3 mph, and point the scooter 15 degrees down. That helps you maintain a steady scooter speed and avoid blurry surges.
- Keep the scooter at waist level with elbows tucked. Two hands cut body twist and steering drift.
- Match your forward pace to the fish, turtle, or snorkeler. Use short bursts, not fussy throttle tapping.
- Lock focus on a high-contrast patch, then hold the same framing as you pass.
- Practice in calm, shallow water first. Check trim and weight placement so the scooter doesn’t wander like a shopping cart.
If you’re feeling first-time jitters, a calm confidence mindset helps you stay smooth and avoid abrupt corrections that can shake the shot.
You’ll feel the line go quiet, and your shots will look clean and intentional.
Shoot Macro Without Losing Stability
For macro shots, think of your sea scooter as a small hover tool, not a speed machine. Use quarter-to-half power, angle the scooter about 15 degrees downward, and hold your body compact for better macro stability. Tuck your elbows, bend your knees, and keep camera and scooter close. Staying within the tour’s weight limit can also improve control and balance for steadier close-up framing.
| Move | Why it works | Quick feel |
|---|---|---|
| Short burst | Matches subject speed | Like tapping brakes |
| Light fin kick | Fine tune distance | Tiny hallway shuffle |
Keep your lens 6 to 12 inches from the subject for sharper color and less haze. Use two hands. Right on throttle, left steadying the camera. Set 1/125 to 1/250s, angle strobes outward, and avoid constant thrust so you don’t zip past focus. A gentle whirr beats wrestling shaky close-ups every single time underwater.
Keep Prop Wash Away From Coral and Sand
When you glide in for a reef shot, think about where your prop wash goes before you touch the throttle. A smart angle keeps coral reefs crisp, your frame clean, and sediment off the scene. In line with reef etiquette, keeping your wash off coral and sand helps protect Hawaii’s delicate reef habitats during sea scooter tours.
- Aim the scooter slightly away so the wash lands 10 to 15 feet from coral.
- Stay at quarter to half throttle, about 2 to 3 mph, near the bottom.
- Tuck arms, straps, and camera close so turbulence doesn’t grab loose gear and spray particles.
- Come from the side, let wash run parallel, then use short bursts to hover and pause before shooting.
You’ll get clearer color, calmer water, and happier polyps, which is a trade for easing off the throttle. Bonus: your photos won’t look like a snow globe.
Check Sea Scooter and Camera Battery Levels
Always check your sea scooter and camera batteries before you suit up, and make sure both read at least 30 percent, or full if you’ve planned a longer run. Then check both scooter and camera batteries again during a quick surface test, so you know the scooter gauge is visible and behaving. For a smooth check-in arrival, plan your prep early enough that battery checks and a quick surface test are done before the tour starts. Clip a charged spare into a sealed dry case on your mesh bag.
After each set, monitor camera battery and strobe/continuous-light levels. Turn off lights between frames and use short scooter bursts to stretch runtime. Remember battery drain cold water, higher speeds, and rapid strobe firing all chew through power faster than you expect. If capacity looks borderline, save juice for your best shots by easing off speed and lowering strobe power.
Handle Flooding or Trigger Failures Fast
When a trigger sticks or the throttle goes rogue, you’ll want to cut power at once with the kill switch or battery connection so the scooter doesn’t bolt like a startled fish. If your camera housing floods, head up to a safe depth or the surface, shut the camera off fast, and get it out of the housing topside before salt water does more damage. These quick moves keep a small problem from turning your smooth photo run into a soggy gear rescue.
Immediate Power Disconnect
Trouble can arrive as a sticky trigger, a suddenly heavy handle, or that odd sloshy feel that says water has gone where it shouldn’t. Don’t debate it underwater. Release the trigger and hit the quick power disconnect, kill switch, or emergency power-off at once.
- Signal your buddy and steady yourself at neutral buoyancy.
- Use practiced shutdown steps so you don’t fumble camera buttons or hoses.
- Keep a quick-release tow strap ready, and give camera gear its own release point.
- After shutdown, check battery reserve above 30 percent, then inspect controls and O-rings for moisture.
If thrust acted weird or seals look compromised, end the photo run. Move to shallow water before any closer inspection. A scooter isn’t worth a runaway ride that day anyway.
Flooded Housing Removal
A flooded housing or jammed trigger turns a fun photo run into a fast gear drill, so cut scooter power first and get yourself stable before you worry about the camera.
If your camera housing floods, switch it off if you can, release mounts, and ascend to a safe depth or surface. At the top, remove housing from your kit, keep it upright, open it, and let water drain before a fresh-water rinse. If the trigger sticks, hit the kill switch, disconnect the battery, and dump the tow strap so the scooter quits pulling. Then dry O-rings, seals, cards, and electronics. Don’t power anything back on for 24 to 48 hours in a dry box with desiccant, and bench test everything before the splash.
Fix Blurry, Dark, or Foggy Underwater Shots
Even in clear blue water, a fast scooter run can turn a great scene into a soft, dark haze if your camera and lighting aren’t set up first. If your frame still looks murky, raise shutter speed or ISO and watch battery reserves, because scooters hum, currents nudge, and tiny mistakes show up fast underwater.
- Before you move, lock your focus with a half-press or back-button autofocus.
- Use quarter-to-half throttle and slow scooter speed so blur, silt, and wobble don’t tag along.
- Keep close, tuck your elbows, and aim strobes or continuous lights slightly ahead at 45° with diffusers.
- Stop fog before the dive. Check O-rings, warm the housing, dry any moisture, and shoot downward or from the side so particles drift behind you.
Frequently Asked Questions
How Do I Plan a Shot List Before a Sea Scooter Tour?
You plan a shot list by setting shot priorities, mapping subject sequencing, and using time blocking for light, current, and battery. Add lens/settings notes, safety distances, and a return route so you don’t waste power.
What Camera Settings Work Best for Wide-Angle Reef Scenes?
You’ll get the best reef shots by going wide angle, wait for it, using shutter priority with a fast shutter, keeping low iso, and setting manual whitebalance so you cut the warm cast and preserve colorful detail.
How Can I Protect My Footage While Traveling to the Dive Site?
Protect your footage by packing cards in waterproof cases, duplicating files to Backup drives, enabling Cloud syncing whenever you’ve got signal, and carrying Travel insurance. You’ll also cushion housings, test seals, and keep batteries dry.
When Should I Use Video Mode Instead of Burst Photos Underwater?
Use video mode when movement’s insanely fast or timing’s impossible: you’ll capture smooth motion, ambient sound, and long takes of turtles, spirals, or macro drift, then pull sharp frames later. Save burst for maximum resolution.
What Safety Rules Apply When Photographing Other Divers on Tour?
You should respect boundaries, follow consent protocol, and maintain buddy awareness when photographing divers. Keep 6–10 feet away, use low scooter power, check gauges and reserves, stabilize with two hands, and back off if signaled.
Conclusion
Turns out the old theory is mostly true: slower is sharper underwater. When you keep the scooter tucked at your waist, use short bursts, and hover close at 3 to 6 feet, the water settles and details pop. Coral stays clean too, with less prop wash. Check batteries, seals, and triggers before you splash. Then you can chase that blue hush, hear the prop’s soft whirr, and come back with clear frames, not excuses either.